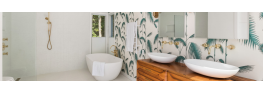


Towel radiators can be both functional and decorative, providing warmth and enhancing the appearance of a room.
However, when a towel radiator starts to look worn, the natural impulse may be to replace it. Given the more costly expense of purchasing a new radiator, painting the existing one could be a more budget-friendly option.
If you're wondering can you paint a heated towel rail, the answer is generally yes. So let’s now find out how to paint a heated towel rail properly.
Guide For Painting A Heated Towel Rail
Before making any effort to manually paint or spray paint heated towel rails you need to ensure the towel radiator remains turned off throughout the painting process.
After turning it off, allow 10-15 minutes for the radiator to cool completely before continuing your work. This is done to prevent burns or scalds, we must stress do not turn on the radiator while painting as you will need to leave it to dry properly too.
So firstly when preparing to paint around a heated towel rail you need to have the correct equipment. Make sure you have all the items below
Equipment you need:
- A good cleaner
- Surface Primer
- Towels on the floor.
- A small paint brush
- Radiator/Towel Radiator paint (ensure it’s water resistant and the right colour you want to change it too)
- Sandpaper, if your towel rail has any loose flaky coatings which need to be sanded down.
Now you have all the equipment we bet you are now wondering if you can paint a heated towel rail now? The good news is, yes you can! Let’s go!
Step 1
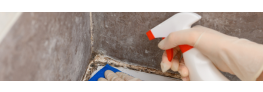
Thoroughly clean the towel rail, including all the fixtures and fittings. Bathrooms tend to get steamy and dusty quickly, so ensure you remove any dirt completely.
Step 2
Apply a single coat of any surface primer to the clean, dry towel rail . This provides an excellent base for the paint.
Directly painting the towel rail without the primer risks the paint smearing all over the place which we all don’t want right!
Step 3
Once the primer dries, which tends to be quite quickly! You can then apply the first layer of paint.
To achieve the best results, try not to overload the paintbrush, and paint in one consistent direction rather than dragging the brush back and forth. This technique will help minimise any visible brush strokes later on.
Step 4
For the best results, you'll likely need to apply a second full coat of paint.
As for a third coat, that's up to your discretion -
It's ideal to keep the heating off for a couple of days to allow the paint ample time to fully cure, but otherwise, the project is complete.
While I can't say for certain how durable this towel rail painting method will be long-term, I can report that so far, it's holding up well. Both rails are functioning normally and providing the same level of heat as before the painting.

How Do You Paint Behind A Heated Towel Rail
Painting a wall-mounted heated towel rail can be challenging. However, there are a few options if you don't want to remove it from the wall.
If you're determined to avoid the hassle of taking it down, we suggest trying to paint as much of the area behind the towel radiator as possible.
But if you have found yourself ultra keen to get it totally painted then here is what you do!
Step 1
Begin by shutting off the valves by turning them clockwise. After that, take a small Phillips screwdriver to remove all retaining screws from the wall brackets.
Once this is completed, position two towels and a washing-up bowl beneath one of the radiator valves.
Step 2
Using an adjustable spanner, loosen the valve nut and position the open outlet over the bowl. Allow the water to drain into the bowl.
Once drainage has ceased, use the radiator key to open the bleed valve; this will help expel any leftover water in the radiator.
Afterward, close the bleed valve and proceed to loosen the other nut located on the valve at the bottom of the radiator.
Step 3
The radiator can be easily removed by gently pulling it away from the wall and pouring any contents into a bowl before turning it upside down to prevent drips. After removing the remaining brackets with a large Phillips screwdriver, you are now prepared to decorate.
Step 4
After completing the painting and redecorating of your towel rail, reinstall the brackets on the wall and reattach the radiator. Be sure to tighten the valve nuts and fully open the valves in the anti-clockwise direction.
The radiator is now prepared for filling. If you have a pressurized system, slightly open the filling loop to top up the system pressure while filling.
Step 5
Ensure the radiator is completely filled with water by bleeding it until water spurts out from the bleed valve, and then shut off the filling loop on your boiler when the pressure reaches between 1 and 1.5 bar with the help of a second person to prevent over-pressurization.
Once completed, turn the heating on and allow the system to warm up, making sure the heated towel rail becomes piping hot.
FAQ
Can You Paint A Chrome Heated Towel Rail?
Yes! For best results on chrome radiators, there is actually a spray paint specifically formulated for that purpose.
Can You Spray Paint A Heated Towel Rail?
Yes, if you want to you can spray paint a towel rail, if you were to do that, we would recommend taking it outside and spray painting it in a safe area in which it doesn't affect anywhere in your home or garden too big!
How To Paint Behind Electric Heated Towel Rail
Very much like manual heated towel rails it would be the same process of either taking it off the wall and doing it manually or trying to paint as much as you can whilst it is still fitted.