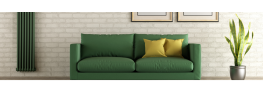


Are you ready to say goodbye to your radiator? Or are you wondering on 'how to remove a radiator for decorating', or how to remove a radiator without draining the system', or even 'how to remove a radiator thermostat'?
Whether you are remodeling your living area or moving to a more modern heating system contemporary heating system, It's crucial to understand how to remove a radiator correctly.
This step-by-step guide will walk you through the process, making it a breeze to say goodbye to that bulky old fashioned radiator, and bring a stylish look to your home for years to come. From shutting off the heating to releasing the valves this easy read guide will help you with the whole process.
So without further hesitation. Let's dive into how to remove a radiator.
What Tools Do You Need To Remove A Radiator?
To successfully remove your radiator, ensure you have the following tools to hand:
- Radiator key
- Adjustable wrenches
- A bowl
Step-By-Step Guide For How To Remove A Radiator
A skilled home plumber can handle the relatively simple task of removing a radiator with little difficulty. But if you want to take the task on by yourself then we recommend following the below steps.
1. Turn Off Your Heating And Allow The Room To Cool:
Before starting the removal process, ensure that the heating is turned off. After turning off your thermostat, wait for a while until the radiator has cooled down.
This prevents the risk of accidentally burning yourself during the removal process. It's advisable to perform this task during warmer months when you don't need immediate heat loss in your home.
2. Close All Valves Connected To The Radiator:
Once the radiator has cooled, close all valves completely. If you have thermostatic radiator valves (TRV), use an adjustable spanner to close them.
You can move on to the next step by closing the valves, which isolates the radiator from the water supply. Depending on the plumbing in your house, you may also decide to drain the entire system at this point
We recommend that you avoid using pliers as this can damage the pipes. It's also important to take note of the number of turns required to close the valves for when you turn it back on after.

3. Drain The Radiator:
To remove water and air from the system, use a radiator bleed key. To collect the water that leaks out of the radiator, place a container underneath it.
For this, placing a shallow bowl that fits beneath the radiator is probably more ideal.

4. Remove the nuts and wall brackets:
Next, use one of the adjustable wrenches to loosen the valve on the opposite side of the radiator.
o start, tilt the radiator a little to drain any last bits of water from the bottom and loosen one of the union nuts. After draining the water, unscrew both union nuts.
Make sure that all of the parts have been taken out of the radiator because older radiators may have extra wall brackets or screws holding them in place.
5.Remove The Radiator:
With all nuts and bolts out of the way, you can now lift the radiator.
It's advisable to have someone assist you with this step as they can be heavy. Lift the radiator slowly and keep it in a vertical position while carrying it out of the room.

6. Clean The Radiator:
Once removed, you can use cleaning supplies to clean the radiator. Polish the metal surfaces with old tights and apply a bit of metal lubricant if needed. After cleaning all the nooks, wipe the radiator with a rag for a final touch.
7. Cap The Pipes:
As a safety measure, consider temporarily closing the radiator valve as a precaution. Temporary capping may be adequate if the radiator needsto be reinstalled. However, a professional plumber must be hired for any permanent pipework adjustments.
FAQs:
How To Remove A Radiator For Decorating
If you're planning to decorate your home and need to temporarily remove a radiator, here’s how you should proceed.
- Step 1: Drain Water - Turn off both valves and unscrew the cabinet that connects the valve to the radiator. Place a bowl under the joint, open the bleed valve gradually to let the water drain into the bowl. Transfer the water from the bowl to a bucket until no more water can be drained.
- Step 2: Lift Radiator - Unscrew the cap nut that attaches the other valve to the radiator. Lift the radiator away from the wall brackets and drain any remaining water into the bucket. It's advised to cap off thermostatic radiator valves (TRVs) if present to prevent potential leaks.
- Step 3: Replace Radiator - Rehang the radiator and tighten the cabinets on both valves. Finally, bleed the air from the radiator.
The removal can be relatively simple and quick, but having a friend's assistance may be necessary, especially if it's a large radiator.
How To Remove A Radiator Without Draining The System
Removing a radiator without draining the entire system requires careful steps to minimize water leakage. While the process is more complex, follow these general guidelines:
- Close radiator valves: Turn off both the lockshield valve and the thermostatic valve on the radiator. Ensure they are tightly closed to prevent water flow.
- Prepare a bucket and towels: Place a bucket beneath the valves and have towels ready to catch any potential water leakage.
- Loosen the radiator connections: Use an adjustable wrench or pliers to loosen the nuts connecting the radiator to the valves. Be cautious not to completely disconnect them yet.
- Tilt the radiator: Carefully tilt the radiator away from the wall while keeping the connections attached. This will create an angle, minimizing water spillage. Catch water with towels: As you tilt the radiator, have towels ready to catch any water that may escape from the valve connections. Move slowly and be prepared to react quickly if water starts to leak.
- Fully disconnect the radiator: Once the radiator is tilted and stable, you can fully disconnect the nuts connecting it to the valves. Continue using towels to absorb any residual water.
Remember, removing a radiator without draining the system can be challenging and carries a higher risk of water leakage. It's advisable to consult a professional plumber to ensure a safe and efficient process.
How To Remove A Radiator Thermostat?
To remove a radiator thermostat, follow these steps:
- Turn off the heating system: Before starting any work, make sure to turn off the heating system to prevent hot water from flowing through the radiator.
- Locate the thermostat: The thermostat is typically attached to the top or side of the radiator. It may be covered by a plastic cap or a protective housing. Remove any covering to access the thermostat.
- Identify the thermostat type: There are various types of radiator thermostats, including capillary tube, liquid-filled, or electronic thermostats. Identify the specific type you have to determine the removal method.
- Remove the thermostat head: For most types, you can remove the thermostat head by turning it counterclockwise. Use a wrench or pliers if necessary, but be careful not to damage the thermostat or the valve underneath.
- Disconnect the thermostat body: After removing the head, you'll see the thermostat body attached to the valve. Use a wrench or pliers to disconnect the body by turning it counterclockwise. Again, take care not to cause any damage.
- Replace or cap the valve: Once the thermostat is removed, you can choose to replace it with a new one or cap the valve if you prefer manual control of the radiator temperature. Follow the manufacturer's instructions for the specific valve type.
- Test and reassemble: After removing the thermostat, turn on the heating system and check if the radiator functions properly. If everything works as expected, reassemble any covers or protective housing that were removed.
It's worth noting that if you're not familiar with radiator thermostats or if you're unsure about any step in the process, it's recommended to consult a professional plumber to ensure safe and correct removal.